已解决
vue3+vite+ts 发布自定义组件到npm
来自网友在路上 191891提问 提问时间:2023-11-21 02:58:35阅读次数: 91
最佳答案 问答题库918位专家为你答疑解惑
vue3+vite 发布自定义组件到npm
- 初始化项目
- 编写组件
- 配置打包
- 组件上传到npm
- 测试组件库
初始化项目
// 创建项目
pnpm create vite vue-test-app --template vue-ts// 运行项目
cd vite vue-test-app
pnpm install
pnpm run dev
编写组件
1、根目录下创建packages目录作为组件的开发包,目录下的index.ts文件作为整个组件库的出口文件,导出组件。
//index.ts
import type { App } from 'vue'
import MyButton from './Button'
import MyTag from './Tag'// 所有组件列表
const components = [MyButton,MyTag
]// 定义 install 方法
const install = (app: App): void => {// 遍历注册所有组件/*component.__name ts报错Argument of type 'string | undefined' is not assignable to parameter of type 'string'.Type 'undefined' is not assignable to type 'string'.ts(2345)解决方式一:使用// @ts-ignore解决方式二:使用类型断言 尖括号语法(component.__name) 或 as语法(component.__name as string)*/components.forEach(component => app.component(component.__name as string, component))
}export {MyButton,MyTag
}const VueTestUI = {install
}export default VueTestUI
2、编写组件,创建packages/Button目录,在该目录下创建Button.vue和index.ts文件。
// Button.vue
<template><button class="MyButton" type="button">我是一个按钮组件</button></template><script lang="ts">export default {name: 'MyButton', //组件名称,必须设置data () {return {}},methods: {},filters: {},created () {}}
</script><style>.MyButton {color: red;}
</style>
// index.ts
import type { App } from 'vue'
import MyButton from "./Button.vue"// 使用install方法,在app.use挂载
MyButton.install = (app: App) => {app.component(MyButton.__name as string, MyButton) //注册组件
}export default MyButton
配置打包
1、修改vite.config.ts配置
import { defineConfig } from 'vite'
import vue from '@vitejs/plugin-vue'
import path from 'path'// https://vitejs.dev/config/
export default defineConfig({plugins: [vue()],base:'/',build:{lib:{entry: path.resolve(__dirname, './packages/index.ts'), //指定组件编译入口文件name: 'vueMoUI',fileName: 'vue-mo-ui'},//库编译模式配置rollupOptions: {external: ['vue', 'swiper', '@vuepic/vue-datepicker', 'qrcode'],output: {// format: 'es', // 默认es,可选 'amd' 'cjs' 'es' 'iife' 'umd' 'system'exports: 'named',globals: { //在UMD构建模式下为这些外部化的依赖提供一个全局变量vue:'Vue',// 'vue-router': 'VueRouter', // 引入vue-router全局变量,否则router.push将无法使用swiper: 'Swiper','@vuepic/vue-datepicker': 'VueDatePicker',qrcode: 'qrcode'}}},/** 设置为 false 可以禁用最小化混淆,或是用来指定使用哪种混淆器。默认为 Esbuild,它比 terser 快 20-40 倍,压缩率只差 1%-2%。注意,在 lib 模式下使用 'es' 时,build.minify 选项不会缩减空格,因为会移除掉 pure 标注,导致破坏 tree-shaking。当设置为 'terser' 时必须先安装 Terser。(yarn add terser -D)*/minify: 'terser', // Vite 2.6.x 以上需要配置 minify: "terser", terserOptions 才能生效terserOptions: { // 在打包代码时移除 console、debugger 和 注释compress: {/* (default: false) -- Pass true to discard calls to console.* functions.If you wish to drop a specific function call such as console.info and/orretain side effects from function arguments after dropping the functioncall then use pure_funcs instead*/drop_console: true, // 生产环境时移除consoledrop_debugger: true},format: {comments: false // 删除注释comments}}}
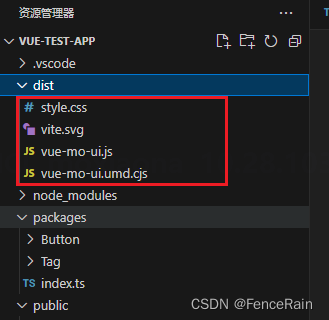
})2、执行打包pnpm run build,会在dist文件夹下生成如下文件
3、修改package.json
//package.json{"name": "vue-mo-ui","private": false,"version": "0.0.0","author": "FenceRain","description": "组件发布npm练习","type": "module","license": "MIT","files": ["dist"],"main": "./dist/vue-mo-ui.umd.cjs","module": "./dist/vue-mo-ui.js","exports": {"./dist/style.css": "./dist/style.css","./css": "./dist/style.css",".": {"import": "./dist/vue-mo-ui.js","require": "./dist/vue-mo-ui.umd.cjs"}},"scripts": {"dev": "vite","build": "vue-tsc && vite build","preview": "vite preview"},"dependencies": {"terser": "^5.19.2","vue": "^3.3.4","vue-mo-ui": "^0.0.0"},"devDependencies": {"@types/node": "^20.5.7","@vitejs/plugin-vue": "^4.2.3","typescript": "^5.0.2","vite": "^4.4.5","vue-tsc": "^1.8.5"}
}
组件上传到npm
1、需要先在npm官网注册自己的npm账户,链接:https://www.npmjs.com/
2、查询是否已存在包名,可以在npm官网查,也可以使用 npm view 包名
3、上传包必须使用npm官方源,如果配置的是其他镜像需要修改回来
- 查看当前源:npm config get registry
- 切换为npm源:npm config set registry https://registry.npmjs.org
4、添加自己的账户
- npm lgoin 回车按照提示操作
- 登录完成之后可以通过npm who am i查看是够登录成功,出现自己的账号即成功
5、上传包,没有报错就是上传成功了,可以登录npm查看到自己的包
npn publish

测试组件库
1、安装组件
pnpm install vue-mo-ui
2、导入使用
<script setup lang="ts">
import {MyButton, MyTag} from 'vue-mo-ui'
</script><template><MyButton></MyButton><MyTag></MyTag>
</template><style scoped></style>
3、如果样式没有加载就在main.ts中导入组件的样式文件
import "../node_modules/vue-mo-ui/dist/style.css"

查看全文
99%的人还看了
相似问题
- Tekton — 通过tekton-operator部署tekton组件
- vue3中使用全局自定义指令和组件自定义指令
- HarmonyOS ArkTS 基础组件的使用(四)
- 界面控件DevExpress WPF流程图组件,完美复制Visio UI!(一)
- Vue2系列 -- 组件自动化全局注册(require.context)
- 扩散模型实战(十一):剖析Stable Diffusion Pipeline各个组件
- django DRF认证组件示例
- MySQL内部组件与日志详解
- 前端新手Vue3+Vite+Ts+Pinia+Sass项目指北系列文章 —— 第五章 Element-Plus组件库安装和使用
- 修改el-radio-group样式,自定义单选组件
猜你感兴趣
版权申明
本文"vue3+vite+ts 发布自定义组件到npm":http://eshow365.cn/6-40831-0.html 内容来自互联网,请自行判断内容的正确性。如有侵权请联系我们,立即删除!
- 上一篇: MyBatis 事务源码分析
- 下一篇: TCP传输的三次握手、四次挥手策略是什么