人脸图像数据增强
最佳答案 问答题库818位专家为你答疑解惑
为什么要做数据增强
在计算机视觉相关任务中,数据增强(Data Augmentation)是一种常用的技术,用于扩展训练数据集的多样性。它包括对原始图像进行一系列随机或有规律的变换,以生成新的训练样本。数据增强的主要目的是增加模型的泛化能力、提高模型的鲁棒性,并减轻过拟合的风险。以下是进行数据增强的几个重要原因:
-
增加数据样本数量:数据增强可以通过生成变体来增加训练样本的数量。这对于具有有限标记样本的任务非常重要,因为更多的数据样本有助于提高模型的性能。
-
泛化能力:数据增强可以引入多样性,使模型能够更好地泛化到新的、未见过的数据。这有助于模型在真实世界的各种情况下表现良好,而不仅仅是在训练时的数据分布中表现良好。
-
鲁棒性:通过对数据进行多样性的变换,模型可以更好地处理因噪声、光照变化、旋转、缩放等因素引起的图像变化。这提高了模型在复杂环境中的稳健性。
-
降低过拟合风险:数据增强可以减轻模型过拟合的风险,因为它迫使模型不仅仅学会记住训练数据,还要学会对数据的变化做出反应。这有助于提高模型对新数据的适应能力。
-
类别平衡:在多类别分类任务中,某些类别的样本数量可能较少。数据增强可以帮助平衡各个类别的样本数量,以防止模型偏向于出现频率较高的类别。
-
节省标注成本:在某些情况下,收集和标记大量的训练数据可能非常昂贵和耗时。通过数据增强,您可以使用较少的标记样本来训练模型,同时保持性能。
常见的数据增强技术包括图像翻转、旋转、缩放、裁剪、颜色变换、加噪声等。选择哪些数据增强技术以及如何应用它们通常取决于具体任务和数据集的特点。数据增强在许多计算机视觉任务中都被广泛使用,包括图像分类、目标检测、分割、人脸识别等。通过增强数据的多样性,可以提高模型的性能并使其更适应复杂的现实世界场景。
人脸图像数据增强
对于人脸图像数据增强,有多种方法可以提高模型的鲁棒性和性能。以下是一些常见的人脸图像数据增强方法:
- 旋转和翻转: 随机旋转或翻转图像,以改变人脸的角度和方向,使模型更具鲁棒性。
- 缩放和裁剪: 随机调整图像的大小并进行裁剪,以模拟不同尺度和视角下的人脸。
- 亮度和对比度调整: 修改图像的亮度、对比度和色彩平衡,以增加模型的鲁棒性。
- 噪声添加: 向图像中添加随机噪声,以模拟真实世界中的图像变化。
- 颜色扭曲: 扭曲图像的颜色通道,使图像对于不同的照明条件更具鲁棒性。
- 遮挡和变形: 在图像中添加遮挡物或变形,以增加模型对于不完整或变形人脸的处理能力。
- 人脸关键点扰动: 对图像中的人脸关键点进行随机扰动,以改变面部特征的位置。
- 风格迁移: 将不同图像的风格应用到人脸图像上,以增加多样性。
- 镜像对称: 镜像对称图像,以生成左右对称的人脸数据。
- 增加噪声数据: 引入合成噪声数据,以增加模型对于嘈杂环境下的鲁棒性。
这些增强方法可以单独使用,也可以组合使用。
实现
以下是个人实现的一些人脸增强方式,不会对原始人脸数据造成太大的干扰,进而不会引入脏数据:
- 旋转:范围在(-20°, 20°) 表示向左向右旋转
def rotate_image(image):rows, cols, _ = image.shapeangle = random.randint(-20, 20)M = cv2.getRotationMatrix2D((cols/2, rows/2), angle, 1)rotated_image = cv2.warpAffine(image, M, (cols, rows))return rotated_image
- 翻转:只水平翻转
def flip_image(image):return cv2.flip(image, 1)
- 缩放:范围是原先的(0.8, 1.2)之间
def scale_image(image, scale_factor):scale_factor = random.uniform(0.8, 1.2)rows, cols, _ = image.shapenew_size = (int(cols * scale_factor), int(rows * scale_factor))scaled_image = cv2.resize(image, new_size)return scaled_image
- 改变亮度对比度
def adjust_brightness_contrast(image):alpha = random.uniform(0.5, 1.5)beta = random.randint(10, 50)return cv2.convertScaleAbs(image, alpha=alpha, beta=beta)
- 改变颜色
def color_distortion(image, color_matrix):# color_matrix = np.array([[0.393, 0.769, 0.189], [0.349, 0.686, 0.168], [0.272, 0.534, 0.131]])return cv2.transform(image, color_matrix)
- 加椒盐噪声
def salt_and_pepper_noise(image, salt_prob=0.01, pepper_prob=0.01):noisy_image = image.copy()total_pixels = image.sizenum_salt = int(total_pixels * salt_prob)salt_coords = [np.random.randint(0, i-1, num_salt) for i in image.shape]noisy_image[salt_coords[0], salt_coords[1]] = 255num_pepper = int(total_pixels * pepper_prob)pepper_coords = [np.random.randint(0, i-1, num_pepper) for i in image.shape]noisy_image[pepper_coords[0], pepper_coords[1]] = 0return noisy_image
- 直方图均衡化
def equalizeHist_image(image):image = cv2.cvtColor(image, cv2.COLOR_BGR2GRAY)return cv2.equalizeHist(image)
- 自适应直方图均衡化
def clahe_image(image):b, g, r = cv2.split(image)clahe = cv2.createCLAHE(clipLimit=2.0, tileGridSize=(5, 5))clahe_b = clahe.apply(b)clahe_g = clahe.apply(g)clahe_r = clahe.apply(r)return cv2.merge((clahe_b, clahe_g, clahe_r))
- 油画与非真实感渲染
def detailEnhance_image(image):return cv2.detailEnhance(image, None, 20, 0.8)
- 局部区域亮度调整
def illumination_change(image):img_zero = np.zeros(image.shape, dtype=np.uint8)return cv2.illuminationChange(image, mask=img_zero, alpha=0.2, beta=0.4)
- 人脸中心点加强或者变暗
def enhance_reduce(image, strength=100):# strength > 0 enhance, strength < 0 reducex, y, _ = image.shaperadius = np.random.randint(10, int(min(x, y)), 1)pos_x = np.random.randint(0, (min(x, y)-radius), 1)pos_y = np.random.randint(0, (min(x, y)-radius), 1)pos_x = int(pos_x[0])pos_y = int(pos_y[0])radius = int(radius[0])for j in range(pos_y-radius, pos_y+radius):for i in range(pos_x-radius, pos_x+radius):distance = math.pow((pos_x-i), 2) + math.pow((pos_y-j), 2)distance = np.sqrt(distance)if distance < radius:result = 1 - distance/radiusresult = result*strengthif strength > 0:image[i, j, 0] = min((image[i, j, 0]+result), 255)image[i, j, 1] = min((image[i, j, 1]+result), 255)image[i, j, 2] = min((image[i, j, 2]+result), 255)else:image[i, j, 0] = max((image[i, j, 0]+result), 0)image[i, j, 1] = max((image[i, j, 1]+result), 0)image[i, j, 2] = max((image[i, j, 2]+result), 0)image = image.astype(np.uint8)return image
- 遮盖
def mask(image, low=10, high=50):x, y, _ = image.shapemask_size = np.random.randint(low, high, 1)pos_x = np.random.randint(low, (min(x, y)-high), 1)pos_y = np.random.randint(low, (min(x, y)-high), 1)pos_x = int(pos_x[0])pos_y = int(pos_y[0])mask_size = int(mask_size[0])image[pos_x:pos_x+mask_size, pos_y:pos_y+mask_size] = 0return image
将上述合并为一个类:
import os
import cv2
import sys
import json
import math
import random
import numpy as npclass ImageAugment:def rotate_image(self, image):rows, cols, _ = image.shapeangle = random.randint(-20, 20)M = cv2.getRotationMatrix2D((cols/2, rows/2), angle, 1)rotated_image = cv2.warpAffine(image, M, (cols, rows))return rotated_imagedef flip_image(self, image):return cv2.flip(image, 1)def scale_image(self, image, scale_factor):scale_factor = random.uniform(0.8, 1.2)rows, cols, _ = image.shapenew_size = (int(cols * scale_factor), int(rows * scale_factor))scaled_image = cv2.resize(image, new_size)scaled_image = cv2.resize(scaled_image, (112, 112))return scaled_imagedef adjust_brightness_contrast(self, image):alpha = random.uniform(0.5, 1.5)beta = random.randint(10, 50)return cv2.convertScaleAbs(image, alpha=alpha, beta=beta)def color_distortion(self, image, color_matrix):return cv2.transform(image, color_matrix)def salt_and_pepper_noise(self, image, salt_prob=0.01, pepper_prob=0.01):noisy_image = image.copy()total_pixels = image.sizenum_salt = int(total_pixels * salt_prob)salt_coords = [np.random.randint(0, i-1, num_salt) for i in image.shape]noisy_image[salt_coords[0], salt_coords[1]] = 255num_pepper = int(total_pixels * pepper_prob)pepper_coords = [np.random.randint(0, i-1, num_pepper) for i in image.shape]noisy_image[pepper_coords[0], pepper_coords[1]] = 0return noisy_imagedef equalizeHist_image(self, image):image = cv2.cvtColor(image, cv2.COLOR_BGR2GRAY)return cv2.equalizeHist(image)def clahe_image(self, image):b, g, r = cv2.split(image)clahe = cv2.createCLAHE(clipLimit=2.0, tileGridSize=(5, 5))clahe_b = clahe.apply(b)clahe_g = clahe.apply(g)clahe_r = clahe.apply(r)return cv2.merge((clahe_b, clahe_g, clahe_r))def detailEnhance_image(self, image):return cv2.detailEnhance(image, None, 20, 0.8)def illumination_change(self, image):img_zero = np.zeros(image.shape, dtype=np.uint8)return cv2.illuminationChange(image, mask=img_zero, alpha=0.2, beta=0.4)def enhance_reduce(self, image, strength=100):# strength > 0 enhance, strength < 0 reducex, y, _ = image.shaperadius = np.random.randint(10, int(min(x, y)), 1)pos_x = np.random.randint(0, (min(x, y)-radius), 1)pos_y = np.random.randint(0, (min(x, y)-radius), 1)pos_x = int(pos_x[0])pos_y = int(pos_y[0])radius = int(radius[0])for j in range(pos_y-radius, pos_y+radius):for i in range(pos_x-radius, pos_x+radius):distance = math.pow((pos_x-i), 2) + math.pow((pos_y-j), 2)distance = np.sqrt(distance)if distance < radius:result = 1 - distance/radiusresult = result*strengthif strength > 0:image[i, j, 0] = min((image[i, j, 0]+result), 255)image[i, j, 1] = min((image[i, j, 1]+result), 255)image[i, j, 2] = min((image[i, j, 2]+result), 255)else:image[i, j, 0] = max((image[i, j, 0]+result), 0)image[i, j, 1] = max((image[i, j, 1]+result), 0)image[i, j, 2] = max((image[i, j, 2]+result), 0)image = image.astype(np.uint8)return imagedef mask(self, image, low=10, high=50):x, y, _ = image.shapemask_size = np.random.randint(low, high, 1)pos_x = np.random.randint(low, (min(x, y)-high), 1)pos_y = np.random.randint(low, (min(x, y)-high), 1)pos_x = int(pos_x[0])pos_y = int(pos_y[0])mask_size = int(mask_size[0])image[pos_x:pos_x+mask_size, pos_y:pos_y+mask_size] = 0return imageif __name__ == '__main__':ia = ImageAugment()image_path = sys.argv[1]image = cv2.imread(image_path)rotated_image = ia.rotate_image(image)flipped_image = ia.flip_image(image)scaled_image = ia.scale_image(image, scale_factor=1.2)adjusted_image = ia.adjust_brightness_contrast(image)color_matrix = np.array([[0.393, 0.769, 0.189], [0.349, 0.686, 0.168], [0.272, 0.534, 0.131]])color_distorted_image = ia.color_distortion(image, color_matrix)salt_image = ia.salt_and_pepper_noise(image)equalize_image = ia.equalizeHist_image(image)clahe_image = ia.clahe_image(image)detailenhance_image = ia.detailEnhance_image(image)illumination_image = ia.illumination_change(image)enhance_image = ia.enhance_reduce(image, 100)reduce_image = ia.enhance_reduce(image, -100)mask_image = ia.mask(image)# savecv2.imwrite('rotated.jpg', rotated_image)cv2.imwrite('flipped.jpg', flipped_image)cv2.imwrite('scaled.jpg', scaled_image)cv2.imwrite('adjusted.jpg', adjusted_image)cv2.imwrite('colorDistorted.jpg', color_distorted_image)cv2.imwrite('salt.jpg', salt_image)cv2.imwrite('equalize.jpg', equalize_image)cv2.imwrite('clahe.jpg', clahe_image)cv2.imwrite('detailenhance.jpg', detailenhance_image)cv2.imwrite('illumination.jpg', illumination_image)cv2.imwrite('enhance.jpg', enhance_image)cv2.imwrite('reduce.jpg', reduce_image)cv2.imwrite('mask.jpg', mask_image)
结果如下:
-
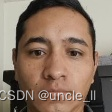
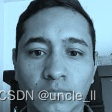
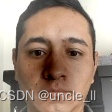
origin image:
-
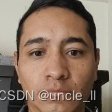
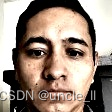
rotate:

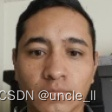
- flip:
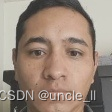
- scale:
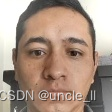
- adjust:
- colorDistorted:
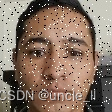
- salt:
- equalize:

- clahe:

- detailenhance:
- illumination:

- enhance and reduce:
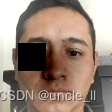
- mask:
参考
- https://blog.csdn.net/qq_39450134/article/details/121886296
- https://blog.csdn.net/u011808673/article/details/90752958
- https://www.youbiguo.com/py/273.html
99%的人还看了
相似问题
猜你感兴趣
版权申明
本文"人脸图像数据增强":http://eshow365.cn/6-12071-0.html 内容来自互联网,请自行判断内容的正确性。如有侵权请联系我们,立即删除!