已解决
CSS动效合集之实现气泡发散动画
来自网友在路上 144844提问 提问时间:2023-09-19 05:23:13阅读次数: 44
最佳答案 问答题库448位专家为你答疑解惑
前言
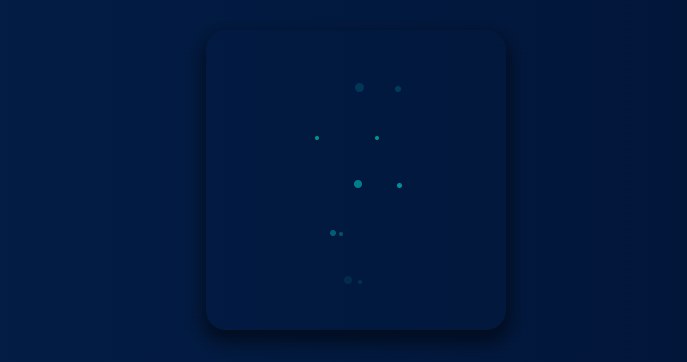
👏CSS动效合集之实现气泡发散动画,速速来Get吧~
🥇文末分享源代码。记得点赞+关注+收藏!
1.实现效果

2.实现步骤
- 定义一个数组bubbles,用来存储气泡列表的基本新,w表示宽高,x表示绝对定位中left的百分比
- 注:以下代码基于vue
const bubbles = ref([{w: 8,x: 10,},{w: 9,x: 50,},{w: 4,x: 30,},{w: 5,x: 80,},{w: 4,x: 30,},{w: 4,x: 70,},{w: 6,x: 20,},{w: 8,x: 50,},{w: 4,x: 60,},{w: 6,x: 65,},
]);
- 绘制父元素section,设置宽高为300px,相对定位
section {height: 300px;width: 300px;margin: 50px auto;position: relative;z-index: 1;border-radius: 20px;box-shadow: 0px 9px 17px 4px rgba(0, 0, 0, 0.5);
}
- section内添加子元素bubbles标签,设置宽高与父元素一致,绝对定位
- 在bubbles用span标签循环展示气泡列表
<div class="bubbles"><spanclass="bubble"v-for="(item, index) in bubbles":key="index"}"></span>
</div>
- 为span标签添加css变量,设置–w表示元素的宽高,–x表示绝对定位中left的百分比
<spanclass="bubble"v-for="(item, index) in bubbles":key="index":style="{'--w': item.w,'--x': item.x,}"
- 气泡设置绝对定位,初始位置居于父元素的底部10%,水平居中,并设置宽高为–w,默认设置背景色为粉色
.bubble {position: absolute;width: calc(1px * var(--w));height: calc(1px * var(--w));  border-radius: 50%;left: calc(50% - calc(1px * calc(var(--w) / 2)));bottom: 10%;background: pink;
}
- 为气泡添加发散动画
.bubble {+     animation: rise 3s infinite linear;
}
- 实现气泡left由水平居中到对应列表中–x的变化,bottom位置由10%到100%的改变,opacity透明度由刚开始的0到中间0.8,最后0的变化
@keyframes rise {0% {left: calc(50% - calc(1px * calc(var(--w) / 2)));opacity: 0;bottom: 10%;}50% {opacity: 0.8;}100% {left: calc(1% * var(--x));bottom: 90%;opacity: 0;}
}
- 给每个气泡设置不同的动画延迟,实现错落的效果,在span标签上添加–d,表示当前标签动画延迟时间

<spanclass="bubble"v-for="(item, index) in bubbles":key="index":style="{'--w': item.w,'--x': item.x,'--d':parseInt(bubbles.length / 2) +1 -Math.abs(index - parseInt(bubbles.length / 2)),}"
></span>
.bubble {+  animation-delay: calc(600ms * var(--d));
}
- 可以发现,设置了动画延迟,在初始阶段,会出现固定的气泡展示在中心位置,这不是我们想要的效果,修改span标签样式,设置其默认的透明度为0
.bubble {+  opacity: 0;
}
- 当前动画时长是3s,动画延迟为间隔600ms * 延长单位,气泡列表长度为10个,我们尝试将动画延迟为间隔设置100ms,会发生什么呢?

- 可以发现,气泡发散效果变的不连贯,延迟的时间间隔不够大,如果想要气泡发散是比较连贯的效果,就需要去平衡动画总时长和延迟间隔
- 为每个气泡设置不同的颜色,定义一个颜色数组colors
colors: {type: Array,default: () => ["#00BABC", "#009FA4", "#00FFC0"],},
- 每个气泡的颜色根据当前数据的索引从colors中获取
bubbles.value.forEach((i, index) => {i.c = props.colors[index]
});
-
那么随之而来一个问题,当bubbles数据过多,colors不够用怎么解决?
-
当colors不够用时候,就从colors的第一项继续赋值
-
定义一个循环取值的方法
/*** 根据索引循环取数值的值,取模运算符(%)来实现循环取数组的值* @param {*} array* @param {*} sort* @returns*/
export const forArrayValue = (array, sort) => {return array[sort % array.length];
};
- bubbles重新赋值
bubbles.value.forEach((i, index) => {i.c = forArrayValue(props.colors, index);
});
- 为每个气泡span标签添加–c变量,表示当前背景颜色
<spanclass="bubble"v-for="(item, index) in bubbles":key="index":style="{'--w': item.w,'--c': item.c,'--x': item.x,'--d':parseInt(bubbles.length / 2) +1 -Math.abs(index - parseInt(bubbles.length / 2)),}"
></span>
.bubble {+ background: var(--c);
}
- 为其父元素bubbles设置溢出隐藏,以防left位置变化超出当前容器,设置z-index为-1,以防遮挡到父元素其他内容
.bubbles {+ z-index: -1;+ overflow: hidden;
}
- 这样就完整的实现啦~
- 当然,你可以可以通过代码,动态的去生成气泡列表,使用Math.random生成其位置和大小,实现原理与上述一致~,这里就不在赘述了
3.实现代码
<template><section><div class="bubbles"><spanclass="bubble"v-for="(item, index) in bubbles":key="index":style="{'--w': item.w,'--c': item.c,'--x': item.x,'--d':parseInt(bubbles.length / 2) +1 -Math.abs(index - parseInt(bubbles.length / 2)),}"></span></div></section>
</template>
<script setup>
import { ref } from "vue";
import { forArrayValue } from "@/utils/tools";
const props = defineProps({colors: {type: Array,default: () => ["#00BABC", "#009FA4", "#00FFC0"],},
});
const bubbles = ref([{w: 8,x: 10,},{w: 9,x: 50,},{w: 4,x: 30,},{w: 5,x: 80,},{w: 4,x: 30,},{w: 4,x: 70,},{w: 6,x: 20,},{w: 8,x: 50,},{w: 4,x: 60,},{w: 6,x: 65,},
]);
bubbles.value.forEach((i, index) => {i.c = forArrayValue(props.colors, index);
});
</script>
<style lang="less" scoped>
section {height: 300px;width: 300px;margin: 50px auto;position: relative;z-index: 1;border-radius: 20px;box-shadow: 0px 9px 17px 4px rgba(0, 0, 0, 0.5);
}
.bubbles {position: absolute;width: 100%;height: 100%;top: 0;left: 0;z-index: -1;overflow: hidden;
}
.bubble {position: absolute;width: calc(1px * var(--w));height: calc(1px * var(--w));background: var(--c);border-radius: 50%;left: calc(50% - calc(1px * calc(var(--w) / 2)));opacity: 0;bottom: 10%;animation: rise 3s infinite linear;animation-delay: calc(600ms * var(--d));
}
@keyframes rise {0% {left: calc(50% - calc(1px * calc(var(--w) / 2)));opacity: 0;bottom: 10%;}50% {opacity: 0.8;}100% {left: calc(1% * var(--x));bottom: 90%;opacity: 0;}
}
</style>
4.写在最后🍒
看完本文如果觉得对你有一丢丢帮助,记得点赞+关注+收藏鸭 🍕
更多相关内容,关注🍥苏苏的bug,🍡苏苏的github,🍪苏苏的码云~
查看全文
99%的人还看了
猜你感兴趣
版权申明
本文"CSS动效合集之实现气泡发散动画":http://eshow365.cn/6-9136-0.html 内容来自互联网,请自行判断内容的正确性。如有侵权请联系我们,立即删除!
- 上一篇: 电脑怎么取消磁盘分区?
- 下一篇: 笔试面试相关记录(5)