已解决
gitlab环境准备
来自网友在路上 184884提问 提问时间:2023-11-20 16:56:04阅读次数: 84
最佳答案 问答题库848位专家为你答疑解惑
1.准备环境
gitlab只支持linux系统,本人在虚拟机下使用Ubuntu作为操作系统,gitlab镜像要使用和操作系统版本对应的版本,(ubuntu18.04,gitlab-ce_13.2.3-ce.0_amd64 .deb)
book@100ask:/$ lsb_release -a
No LSB modules are available.
Distributor ID:	Ubuntu
Description:	Ubuntu 18.04.2 LTS
Release:	18.04
Codename:	bionic
2.下载gitlab
gitlab官网下载速度较慢且后续配置较麻烦,所以使用清华大学镜像,网址如下
Index of /gitlab-ce/ubuntu/pool/bionic/main/g/gitlab-ce/ | 清华大学开源软件镜像站 | Tsinghua Open Source Mirror
将gitlab镜像放入ubuntu某个路径下
3.安装前先安装依赖
安装邮件服务的时候会出现邮件配置,使用左右键和回车键选择确定、取消,弹出列表选项的时候,选择Internet Site
sudo apt update
sudo apt install ca-certificates curl openssh-server postfix
4.在放镜像的安装gitlab
sudo pdkg -i gitlab-ce_13.2.3-ce.0_amd64 5.安装成功提示
book@100ask:~$ sudo dpkg -i gitlab-ce_13.2.3-ce.0_amd64\ .deb
Selecting previously unselected package gitlab-ce.
(Reading database ... 133527 files and directories currently installed.)
Preparing to unpack gitlab-ce_13.2.3-ce.0_amd64 .deb ...
Unpacking gitlab-ce (13.2.3-ce.0) ...
Setting up gitlab-ce (13.2.3-ce.0) ...
It looks like GitLab has not been configured yet; skipping the upgrade script.*.                  *.***                 ********               *****.******             ***************            ********,,,,,,,,,***********,,,,,,,,,,,,,,,,,,,,*********,,,,,,,,,,,.,,,,,,,,,,,*******,,,,,,,,,,,,,,,,,,,,,*****,,,,,,,,,.,,,,,,,****,,,,,,.,,,***,,,,,*,._______ __  __          __/ ____(_) /_/ /   ____ _/ /_/ / __/ / __/ /   / __ `/ __ \/ /_/ / / /_/ /___/ /_/ / /_/ /\____/_/\__/_____/\__,_/_.___/Thank you for installing GitLab!
GitLab was unable to detect a valid hostname for your instance.
Please configure a URL for your GitLab instance by setting `external_url`
configuration in /etc/gitlab/gitlab.rb file.
Then, you can start your GitLab instance by running the following command:sudo gitlab-ctl reconfigureFor a comprehensive list of configuration options please see the Omnibus GitLab                                                                    readme
https://gitlab.com/gitlab-org/omnibus-gitlab/blob/master/README.md
6.安装完配置网址
修改/etc/gitlab/gitlab.rb中的external_url配置访问页面,因为我是本地的虚拟机中安装的,所以可配置虚拟机的IP地址 external_url ‘http://localhost’
book@100ask:/$ cd /etc/gitlab/
book@100ask:/etc/gitlab$ ls
gitlab.rb  gitlab-secrets.json  trusted-certsbook@100ask:/etc/gitlab$ sudo vim gitlab.rb
external_url 'http://192.168.0.104'
7.配置完,初始化gitlab
sudo gitlab-ctl reconfigure8.检查gitlab是否安装好,用如下命令检查
sudo gitlab-ctl status正常提示如下
book@100ask:/etc/gitlab$ sudo gitlab-ctl status
run: alertmanager: (pid 23499) 35390s; run: log: (pid 23133) 35508s
run: gitaly: (pid 23463) 35394s; run: log: (pid 22470) 35661s
run: gitlab-exporter: (pid 23445) 35394s; run: log: (pid 22995) 35532s
run: gitlab-workhorse: (pid 23422) 35396s; run: log: (pid 22897) 35571s
run: grafana: (pid 23596) 35389s; run: log: (pid 23355) 35425s
run: logrotate: (pid 56544) 3153s; run: log: (pid 22931) 35560s
run: nginx: (pid 22901) 35568s; run: log: (pid 22915) 35565s
run: node-exporter: (pid 23435) 35395s; run: log: (pid 22971) 35548s
run: postgres-exporter: (pid 23511) 35390s; run: log: (pid 23197) 35502s
run: postgresql: (pid 22597) 35647s; run: log: (pid 22605) 35646s
run: prometheus: (pid 23474) 35394s; run: log: (pid 23043) 35516s
run: puma: (pid 22781) 35587s; run: log: (pid 22795) 35584s
run: redis: (pid 22414) 35671s; run: log: (pid 22430) 35668s
run: redis-exporter: (pid 23454) 35395s; run: log: (pid 23014) 35521s
run: sidekiq: (pid 22798) 35581s; run: log: (pid 22810) 35578s
9.在本地window下的浏览器中输入http://192.168.0.104

10.重新设置密码
输入两次密码后,点击Change your password就可以了
11.登录使用root和刚设置的密码

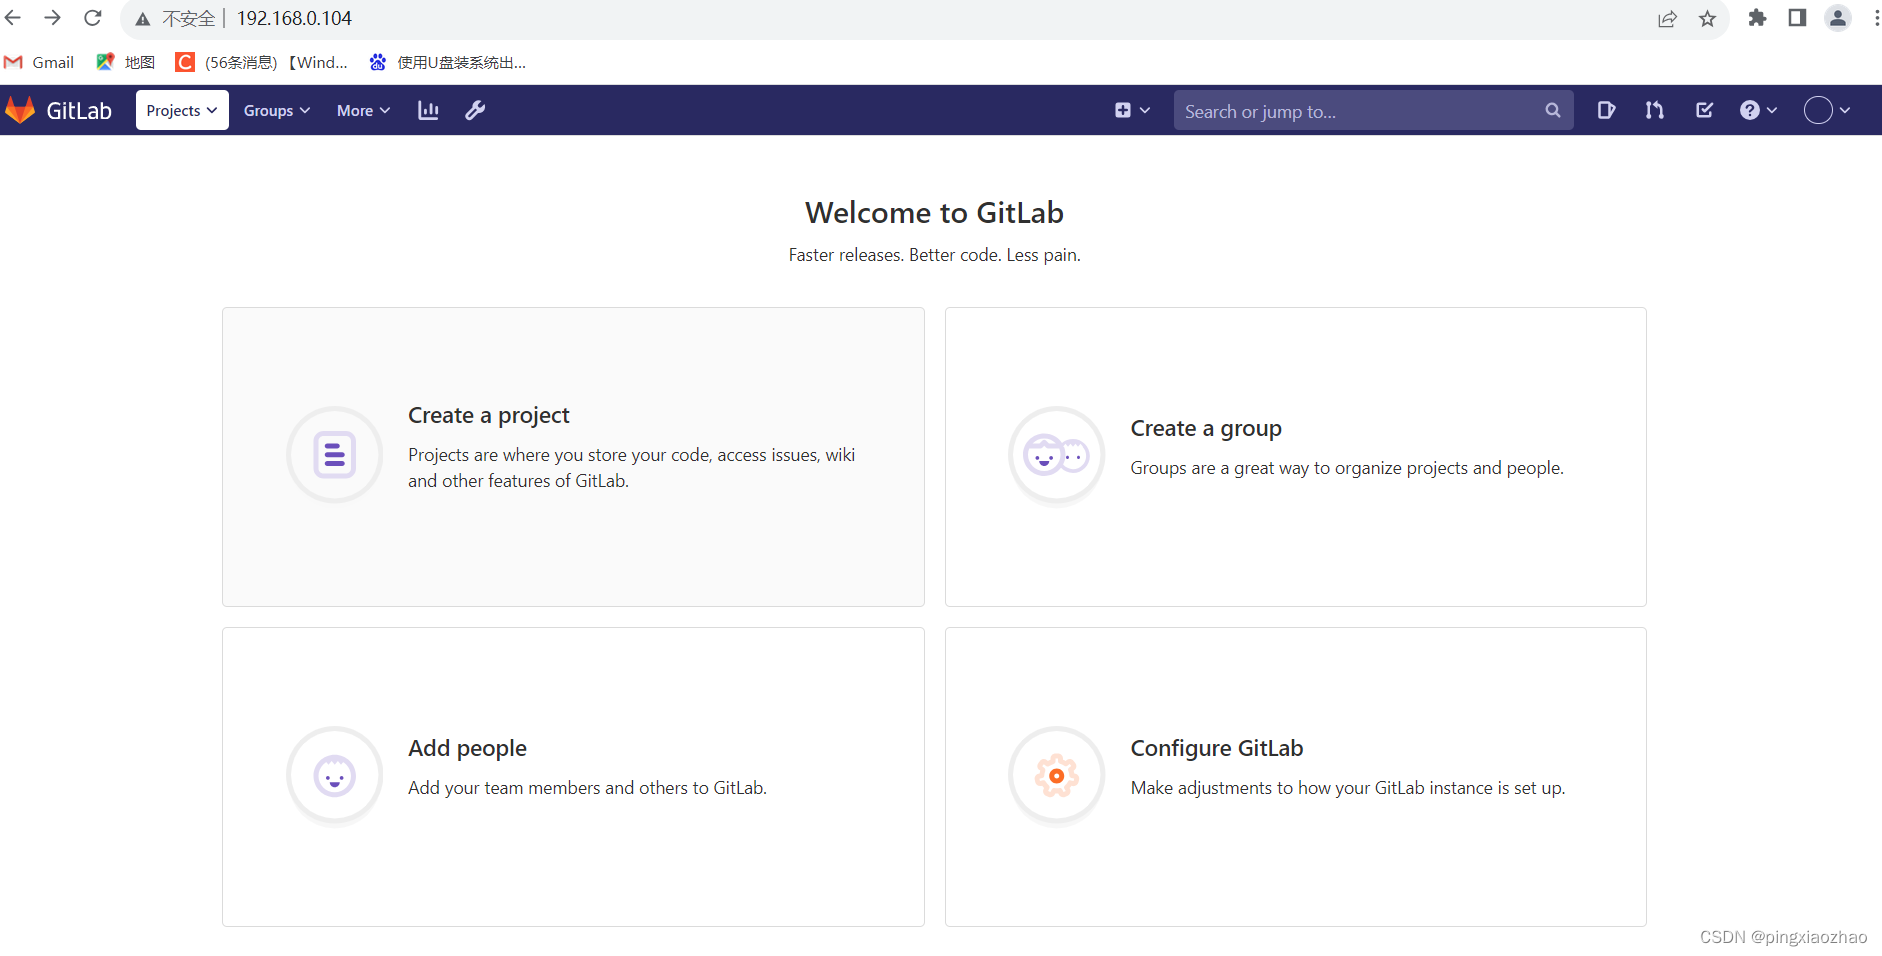
12.正常登录显示
查看全文
99%的人还看了
相似问题
- 树莓派镜像安装 + 设置 + 镜像批量化操作 - 自动化烧写工具 (四)
- composer切换全局镜像源的方法
- 推荐一个windows上传linux服务器/linux服务器的docker镜像的工具,摆脱docker cp,以及解决常见问题。
- docker下移除不使用的镜像、容器、卷、网络
- 一起学docker系列之四docker的常用命令--系统操作docker命令及镜像命令
- qcow2、raw、vmdk等镜像格式工具
- 获取阿里云Docker镜像加速器
- 3.8-镜像的发布
- 【备忘录】Docker容器、镜像删除与资源清理命令
- 8.jib-maven-plugin构建springboot项目镜像,docker部署配置
猜你感兴趣
版权申明
本文"gitlab环境准备":http://eshow365.cn/6-40502-0.html 内容来自互联网,请自行判断内容的正确性。如有侵权请联系我们,立即删除!