036-第三代软件开发-系统时间设置
最佳答案 问答题库638位专家为你答疑解惑

第三代软件开发-系统时间设置
文章目录
- 第三代软件开发-系统时间设置
- 项目介绍
- 系统时间设置
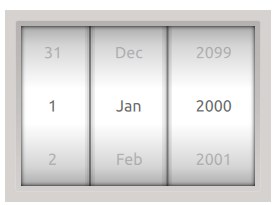
- 演示效果
- QML 实现
- 小伙伴自创 Tumbler
- Qt 家 Tumbler
- C++ 端实现
- 总结一下
关键字:
Qt、
Qml、
Time、
时间、
系统
项目介绍
欢迎来到我们的 QML & C++ 项目!这个项目结合了 QML(Qt Meta-Object Language)和 C++ 的强大功能,旨在开发出色的用户界面和高性能的后端逻辑。
在项目中,我们利用 QML 的声明式语法和可视化设计能力创建出现代化的用户界面。通过直观的编码和可重用的组件,我们能够迅速开发出丰富多样的界面效果和动画效果。同时,我们利用 QML 强大的集成能力,轻松将 C++ 的底层逻辑和数据模型集成到前端界面中。
在后端方面,我们使用 C++ 编写高性能的算法、数据处理和计算逻辑。C++ 是一种强大的编程语言,能够提供卓越的性能和可扩展性。我们的团队致力于优化代码,减少资源消耗,以确保我们的项目在各种平台和设备上都能够高效运行。
无论您是对 QML 和 C++ 开发感兴趣,还是需要我们为您构建复杂的用户界面和后端逻辑,我们都随时准备为您提供支持。请随时联系我们,让我们一同打造现代化、高性能的 QML & C++ 项目!
重要说明☝
☀该专栏在第三代软开发更新完将涨价
系统时间设置
因为Qt目前好像没有针对这个的库,所以目前的实现是基于Linux的,准确是是Ubuntu22.04版本。
演示效果
这是来之我们公司小伙伴的作品,我们今天就学习一下。顺带Review一下,看看能不能发现什么BUG。

其实之前这位小伙伴搞复杂了,想着用什么控件啥的,其实Linux是啥,最便捷的就只指令代码,我最开始给他的就是前端qml吧界面撸出来,后端发个指令设置下时间就OK了,不过看他第一版的时候好像整了不少东西,后面好像改成指令。
QML 实现
你看看,少叮嘱一句也不行,上来就给我手撸一个Tumbler;
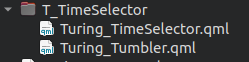
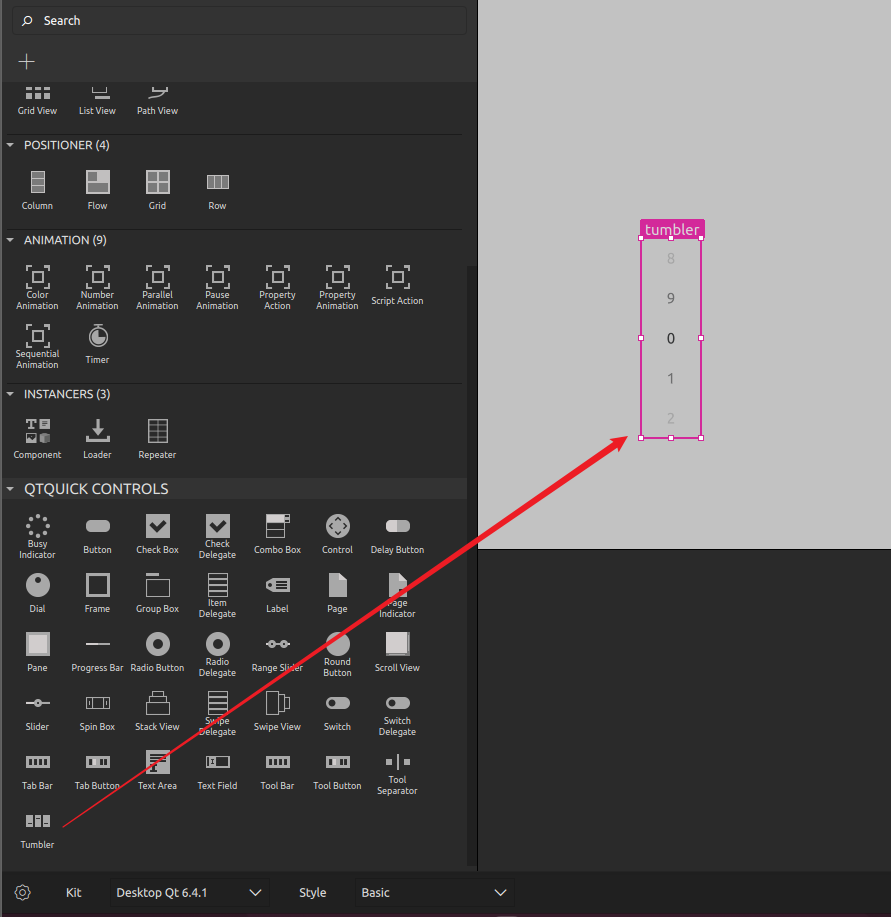
这里要给大家推荐一下Qt Desing Studio,不是说这个有多香,反正我是不喜欢用,qml 我都是纯手撸代码,如果我们不知道一个东西Qt 到底有没有给我们实现的时候,可以用它看看。
你看,这不Qt已经为咱们写了吗。
不过小伙伴写都写了,咱们还是看一下吧
小伙伴自创 Tumbler
import QtQuick 2.12
import QtQuick.Layouts 1.12Rectangle {id: rootReccolor: "transparent"property int min: -1property int max: -1property int current: -1property int zero: 0//获取最终结果function getResult(){return (myPathView.currentIndex + root.min)}ColumnLayout{anchors.fill: parentItem {Layout.fillHeight: trueLayout.fillWidth: trueLayout.margins: 10PathView{id: myPathViewanchors.fill: parentcurrentIndex:  (-1 === rootRec.current) ? 0 : (rootRec.current - rootRec.min)onCurrentIndexChanged: { rootRec.current = currentIndex + rootRec.min; }model: (rootRec.max - rootRec.min + 1)delegate: Item{//width:myPathView.width/2height:myPathView.height/myPathView.pathItemCountscale: PathView.iconScale!==undefined?PathView.iconScale:1opacity: PathView.iconOpacity!==undefined?PathView.iconOpacity:1z:PathView.iconZ!==undefined?PathView.iconZ:1transform: Rotation {origin.x: width/2origin.y: height/2axis.x: 1axis.y: 0axis.z: 0angle: PathView.iconAngle!==undefined?PathView.iconAngle:0}Text{id:timeTextanchors.centerIn: parenttext: String(Number(modelData) + rootRec.min).padStart(rootRec.zero, '0')color: PathView.isCurrentItem ? "#0099ff" : Qt.lighter("#FFFFFF")font.pixelSize: 20verticalAlignment: Text.AlignVCenterhorizontalAlignment: Text.AlignHCenter}}pathItemCount: 5preferredHighlightBegin: 0.5preferredHighlightEnd: 0.5highlightRangeMode: PathView.StrictlyEnforceRange//交互属性,支持拖动等……interactive: true//滑动速度maximumFlickVelocity:100path :pathVerticalPath{//------------垂直变化------------id:pathVerticalproperty int height: myPathView.heightstartX: myPathView.width/2PathLine { id:line1; x: pathVertical.startX; y: pathVertical.startY; }PathAttribute { name: "iconZ"; value: 1 }PathAttribute { name: "iconScale"; value: 0.6 }PathAttribute { name: "iconOpacity"; value: 0.3 }PathAttribute { name: "iconAngle"; value: 80  }PathPercent { value: 0 }// start scaling upPathLine { id:line2; x: line1.x; y: line1.y + pathVertical.height; }PathAttribute { name: "iconZ"; value: 2 }PathAttribute { name: "iconScale"; value: 0.8 }PathAttribute { name: "iconOpacity"; value: 0.4 }PathAttribute { name: "iconAngle"; value: 50  }PathPercent { value: 1/4 }// middle pointPathLine { x: line2.x; y: line2.y; }PathAttribute { name: "iconZ"; value: 5 }PathAttribute { name: "iconScale"; value: 1.0 }PathAttribute { name: "iconOpacity"; value:1.0 }PathAttribute { name: "iconAngle"; value: 0  }PathPercent { value: 2/4}// start scaling downPathLine { x: line2.x; y: line2.y; }PathAttribute { name: "iconZ"; value: 2 }PathAttribute { name: "iconScale"; value: 0.8}PathAttribute { name: "iconOpacity"; value: 0.4 }PathAttribute { name: "iconAngle"; value: -50  }PathPercent { value: 3/4 }// last pointPathLine { x: line2.x; y: line2.y; }PathAttribute { name: "iconZ"; value: 1 }PathAttribute { name: "iconScale"; value: 0.6 }PathAttribute { name: "iconOpacity"; value:0.3 }PathAttribute { name: "iconAngle"; value: -80  }PathPercent { value: 1}}}}}
}
Qt 家 Tumbler
通过帮助文档,咱们可以看到有两个版本的 Tumbler,如下图所示

- Controls 版本
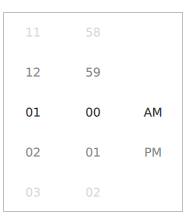
示例代码如下:
import QtQuick 2.12import QtQuick.Window 2.2import QtQuick.Controls 2.12Rectangle {width: frame.implicitWidth + 10height: frame.implicitHeight + 10function formatText(count, modelData) {var data = count === 12 ? modelData + 1 : modelData;return data.toString().length < 2 ? "0" + data : data;}FontMetrics {id: fontMetrics}Component {id: delegateComponentLabel {text: formatText(Tumbler.tumbler.count, modelData)opacity: 1.0 - Math.abs(Tumbler.displacement) / (Tumbler.tumbler.visibleItemCount / 2)horizontalAlignment: Text.AlignHCenterverticalAlignment: Text.AlignVCenterfont.pixelSize: fontMetrics.font.pixelSize * 1.25}}Frame {id: framepadding: 0anchors.centerIn: parentRow {id: rowTumbler {id: hoursTumblermodel: 12delegate: delegateComponent}Tumbler {id: minutesTumblermodel: 60delegate: delegateComponent}Tumbler {id: amPmTumblermodel: ["AM", "PM"]delegate: delegateComponent}}}}
当然,我们也可以自定义 Tumbler,官方示例如下:
import QtQuick 2.12import QtQuick.Controls 2.12Tumbler {id: controlmodel: 15background: Item {Rectangle {opacity: control.enabled ? 0.2 : 0.1border.color: "#000000"width: parent.widthheight: 1anchors.top: parent.top}Rectangle {opacity: control.enabled ? 0.2 : 0.1border.color: "#000000"width: parent.widthheight: 1anchors.bottom: parent.bottom}}delegate: Text {text: qsTr("Item %1").arg(modelData + 1)font: control.fonthorizontalAlignment: Text.AlignHCenterverticalAlignment: Text.AlignVCenteropacity: 1.0 - Math.abs(Tumbler.displacement) / (control.visibleItemCount / 2)}Rectangle {anchors.horizontalCenter: control.horizontalCentery: control.height * 0.4width: 40height: 1color: "#21be2b"}Rectangle {anchors.horizontalCenter: control.horizontalCentery: control.height * 0.6width: 40height: 1color: "#21be2b"}}
这里还有两个更高级的版本,不过我没有用过,咱们帖一下,占点字符空间哈
If you want to define your own contentItem, use either a ListView or PathView as the root item. For a wrapping Tumbler, use PathView:
Tumbler {id: tumblercontentItem: PathView {id: pathViewmodel: tumbler.modeldelegate: tumbler.delegateclip: truepathItemCount: tumbler.visibleItemCount + 1preferredHighlightBegin: 0.5preferredHighlightEnd: 0.5dragMargin: width / 2path: Path {startX: pathView.width / 2startY: -pathView.delegateHeight / 2PathLine {x: pathView.width / 2y: pathView.pathItemCount * pathView.delegateHeight - pathView.delegateHeight / 2}}property real delegateHeight: tumbler.availableHeight / tumbler.visibleItemCount}
}
For a non-wrapping Tumbler, use ListView:
Tumbler {id: tumblercontentItem: ListView {model: tumbler.modeldelegate: tumbler.delegatesnapMode: ListView.SnapToItemhighlightRangeMode: ListView.StrictlyEnforceRangepreferredHighlightBegin: height / 2 - (height / tumbler.visibleItemCount / 2)preferredHighlightEnd: height / 2 + (height / tumbler.visibleItemCount / 2)clip: true}
}
- Extras版本
官方示例如下:
The Tumbler control is used with one or more TumblerColumn items, which define the content of each column:
Tumbler {TumblerColumn {model: 5}TumblerColumn {model: [0, 1, 2, 3, 4]}TumblerColumn {model: ["A", "B", "C", "D", "E"]}}
You can also use a traditional model with roles:
Rectangle {width: 220height: 350color: "#494d53"ListModel {id: listModelListElement {foo: "A"bar: "B"baz: "C"}ListElement {foo: "A"bar: "B"baz: "C"}ListElement {foo: "A"bar: "B"baz: "C"}}Tumbler {anchors.centerIn: parentTumblerColumn {model: listModelrole: "foo"}TumblerColumn {model: listModelrole: "bar"}TumblerColumn {model: listModelrole: "baz"}}} C++ 端实现
哎,甭管那些了,总之目前是实现了功能了,咱们还是看看C++端的实现代码吧,后期如果有机会,我在尝试下
/*** @brief XXXX::updateTime* @param strTime* @return* 更新时间*/
int XXXX::updateTime(QString strTime)
{QString strDate = strTime.split(" ").at(0);QString strTimer = strTime.split(" ").at(1);QString year = strDate.split("-").at(0);        //年QString month = strDate.split("-").at(1);       //月QString day = strDate.split("-").at(2);         //日QString hour = strTimer.split(":").at(0);       //时QString min = strTimer.split(":").at(1);        //分QString second = strTimer.split(":").at(2);     //秒QString a = "date -s" + year + "/" + month + "/" + day;QString b = "date -s" + hour + ":" + min + ":" + second;char *ch;QByteArray ba = a.toLatin1();ch = ba.data();char *ch_2;QByteArray ba_2 = b.toLatin1();ch_2 = ba_2.data();system(ch);system(ch_2);//强制写入到CMOSsystem("hwclock -w");return 1;
}
如我所愿,最后还是还是用了指令的方式实现了。
总结一下
不尽人意。目前功能开发工作量比较大,先这么滴吧,以实现功能优先,后期再重构。目前这个我也只能分享官方的示例代码,我没有实际写过这个模块。小弟也没有问我,而我也在忙着撸自己的KPI,没有及时Review他的代码,看到实现功能就给过了,没想到呀,不过其实也如你所愿,可能我们的领导并不关注我们的实现方式是否合理,在某一特定条件下,他可能更看重结果。不顾纸是包不住火的,在他时间宽裕的时候,总是会在回头看看的,所以小伙伴们,在条件的允许的情况下,还是要确保你的代码尽可能的合理。

99%的人还看了
相似问题
猜你感兴趣
版权申明
本文"036-第三代软件开发-系统时间设置":http://eshow365.cn/6-27267-0.html 内容来自互联网,请自行判断内容的正确性。如有侵权请联系我们,立即删除!