已解决
三.vue2路由知识全总结
来自网友在路上 151851提问 提问时间:2023-09-24 14:48:44阅读次数: 51
最佳答案 问答题库518位专家为你答疑解惑

Vue Devtools:插件安装,展示模块中的数据
vue-router

应用场景:Vue Router 是 Vue.js 的官方路由。它与 Vue.js 核心深度集成,让用 Vue.js 构建单页应用变得轻而易举。
- 嵌套的路由/视图表
- 模块化的、基于组件的路由配置
- 路由参数、查询、通配符
- 基于 Vue.js 过渡系统的视图过渡效果
- 细粒度的导航控制
- 带有自动激活的 CSS class 的链接
- HTML5 历史模式或 hash 模式,在 IE9 中自动降级
- 自定义的滚动条行为
根目录-子目录
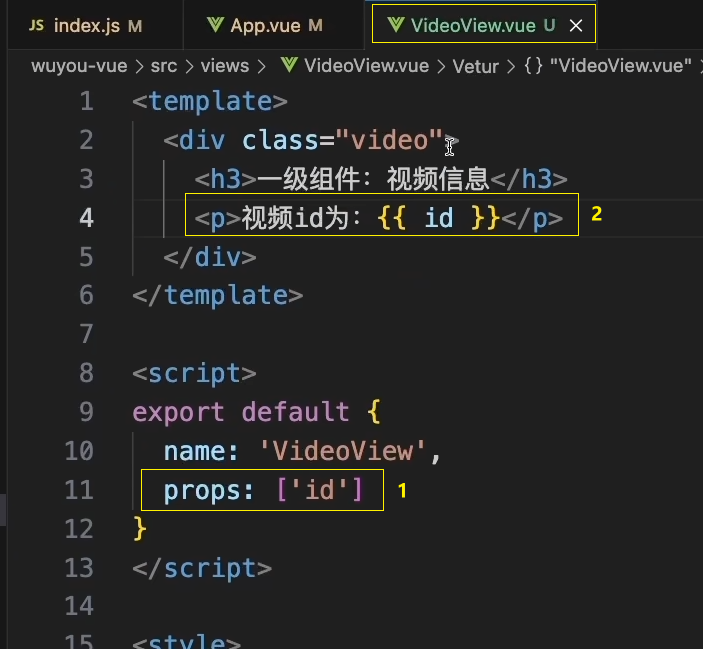
1.深入id的值控制页面展示/动态路由
应用场景:不同的id展示不同的页面,动态控制展示的内容
在路由中设置:

在组件中设置:
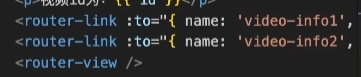
在app.vue中设置:

2.嵌套路由
应用场景:组件里面嵌套组件

......

3.编程式导航
应用场景:路由守卫、强制跳转
this.$router.push({name:'index'}) 路由导航
this.$route.query 获取路由传来的数据
4.vue-router路由传参方法详解
一、使用vue里的标签来传递参数
1.标签传参
<router-link :to="{path:'/login',query:{userId: "33333"}}"></router-link><router-link :to="{name:''Message'',params:{userId:'1234'}}">Hi页面1</router-link>
2.接收参数用this.$route.params.userId
二、使用router的name属性也就是params来传递参数,params:参数不会显示到路径上,用params传参,这个方法有一个bug就是当你传参过去的时候,再次刷新页面时参数就会丢失;
params传参: 1.配置路径router
export default new Router({routes: [{path: '/testVueRouter',name: 'TestVueRouter',component: TestVueRouter},{path: '/testVueRouterTo',// 一定要写name,params必须用name来识别路径name: 'TestVueRouterTo',component: TestVueRouterTo}]
})
2.传递参数用$router
<!-- test-vue-router页面 -->
<template><div><a @click="routerTo()">query传参</a></div>
</template>
<script>
export default {methods: {routerTo() {this.$router.push({name: `TestVueRouterTo`,params: {page: '1', code: '8989'}})}}
}
</script>
3:接受参数用$route
<!-- test-vue-router-to页面 -->
<template><div></div>
</template>
<script>
export default{data() {return {page: '',code: ''}},created() {this.getRouterData()},methods: {getRouterData() {this.page = this.$route.params.pagethis.code = this.$route.params.codeconsole.log('page', this.page)console.log('code', this.code)}}
}
</script>
三、query:最好也用name来识别,保持与params一致性,好记了,路径传参,query:由于参数适用路径传参的所以F5强制刷新也不会被清空。(传参强烈建议适用string)(常用)
1.配置路径router
export default new Router({routes: [{path: '/testVueRouter',name: 'TestVueRouter',component: TestVueRouter},{path: '/testVueRouterTo',// 一定要写name,params必须用name来识别路径name: 'TestVueRouterTo',component: TestVueRouterTo}]
})
2.query传参
<!-- test-vue-router页面 -->
<template><div><a @click="routerTo()">query传参</a></div>
</template>
<script>
export default {methods: {routerTo() {this.$router.push({name: `TestVueRouterTo`,     // 只是把query改了,其他都没变query: {page: '1', code: '8989'}})}}
}
</script>
3.接收参数
<!-- test-vue-router-to页面 -->
<template><div></div>
</template>
<script>
export default{data() {return {page: '',code: ''}},created() {this.getRouterData()},methods: {getRouterData() {// 只是改了query,其他都不变this.page = this.$route.query.pagethis.code = this.$route.query.codeconsole.log('page', this.page)console.log('code', this.code)}}
}
</script>
如果要隐藏参数用params,如果强制刷新不被清除用query
原文地址:vue-router路由传参方法详解 - 掘金
查看全文
99%的人还看了
相似问题
猜你感兴趣
版权申明
本文"三.vue2路由知识全总结":http://eshow365.cn/6-12818-0.html 内容来自互联网,请自行判断内容的正确性。如有侵权请联系我们,立即删除!
- 上一篇: java Excel 自用开发模板
- 下一篇: linux中的开发工具