已解决
next项目部署到云服务器上(手动)
来自网友在路上 150850提问 提问时间:2023-10-28 18:16:32阅读次数: 50
最佳答案 问答题库508位专家为你答疑解惑
准备环境:
云服务器 ECS,服务器安装好了docker
自己的next项目
开始:
1.在next项目根目录下创建Dockerfile文件
FROM node:18-alpine AS base# Install dependencies only when needed
FROM base AS deps
# Check https://github.com/nodejs/docker-node/tree/b4117f9333da4138b03a546ec926ef50a31506c3#nodealpine to understand why libc6-compat might be needed.
RUN apk add --no-cache libc6-compat
WORKDIR /app# Install dependencies based on the preferred package manager
COPY package.json yarn.lock* package-lock.json* pnpm-lock.yaml* ./
RUN \if [ -f yarn.lock ]; then yarn --frozen-lockfile; \elif [ -f package-lock.json ]; then npm ci; \elif [ -f pnpm-lock.yaml ]; then yarn global add pnpm && pnpm i --frozen-lockfile; \else echo "Lockfile not found." && exit 1; \fi# Rebuild the source code only when needed
FROM base AS builder
WORKDIR /app
COPY --from=deps /app/node_modules ./node_modules
COPY . .# Next.js collects completely anonymous telemetry data about general usage.
# Learn more here: https://nextjs.org/telemetry
# Uncomment the following line in case you want to disable telemetry during the build.
# ENV NEXT_TELEMETRY_DISABLED 1RUN yarn build# If using npm comment out above and use below instead
# RUN npm run build# Production image, copy all the files and run next
FROM base AS runner
WORKDIR /appENV NODE_ENV production
# Uncomment the following line in case you want to disable telemetry during runtime.
# ENV NEXT_TELEMETRY_DISABLED 1RUN addgroup --system --gid 1001 nodejs
RUN adduser --system --uid 1001 nextjsCOPY --from=builder /app/public ./public# Set the correct permission for prerender cache
RUN mkdir .next
RUN chown nextjs:nodejs .next# Automatically leverage output traces to reduce image size
# https://nextjs.org/docs/advanced-features/output-file-tracing
COPY --from=builder --chown=nextjs:nodejs /app/.next/standalone ./
COPY --from=builder --chown=nextjs:nodejs /app/.next/static ./.next/staticUSER nextjsEXPOSE 3000ENV PORT 3000
# set hostname to localhost
ENV HOSTNAME "0.0.0.0"CMD ["node", "server.js"]
2.更改项目中next.config.js文件(主要是增加ouput这个)
// next.config.js
module.exports = {// ... rest of the configuration.output: 'standalone',
}
3.把项目放到云服务器上
方法多样
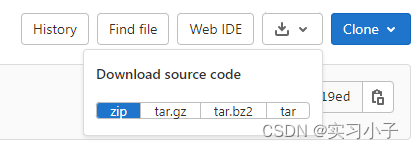
我是通过写完把代码push到远端gitlab后,下载了tar文件,在通过finalShell把文件手动上传到目录下的

4.解压上传的文件
切到对应的目录下(项目文件名改成自己的)
tar -xvf international_station-master.tar5.创建docker镜像(换成自己的项目名称,别怀疑是有. 的)
docker build -t international_station-master .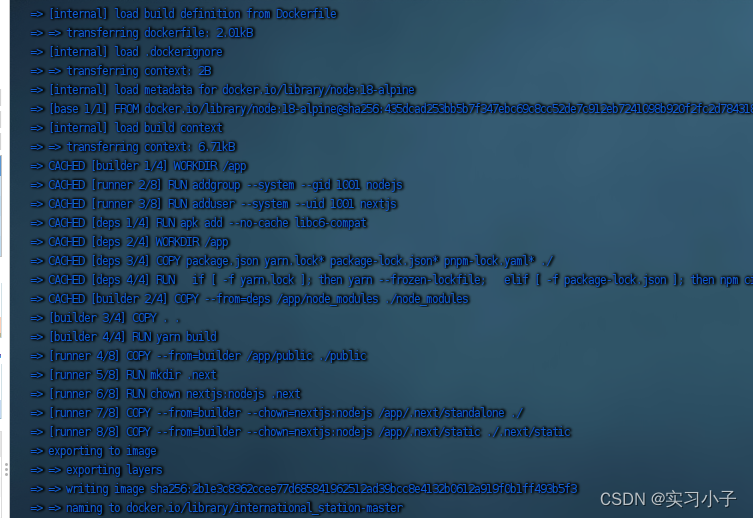
这样就打包好了
6.docker images一下看看是否创建镜像成功

7.通过镜像创建容器,并启动
docker run -d -p 3000:3000 --name webserver international_station-master:latest
8.如果是阿里云的话,记得把3000端口号加上安全组,然后就能通过ip:3000访问啦

查看全文
99%的人还看了
相似问题
- 适合小白的超详细yolov8环境配置+实例运行教程,从零开始教你如何使用yolov8训练自己的数据集(Windows+conda+pycharm)
- ChatGpt3.5已经应用了一段时间,分享一些自己的使用心得.
- Github小彩蛋显示自己的README,git 个人首页的 README,readme基本语法
- YOLOv5独家原创改进:最新原创WIoU_NMS改进点,改进有效可以直接当做自己的原创改进点来写,提升网络模型性能精度
- 如何上传自己的npm包
- 实操创建属于自己的亚马逊云科技VPS服务:Amazon Lightsail
- 开设自己的网站系类03安装数据库(centos版)
- 用趋动云GPU部署自己的Stable Diffusion
- 如何高效的提升自己的逻辑思维能力?
- 3 任务3 使用趋动云部署自己的stable-diffusion
猜你感兴趣
版权申明
本文"next项目部署到云服务器上(手动)":http://eshow365.cn/6-26998-0.html 内容来自互联网,请自行判断内容的正确性。如有侵权请联系我们,立即删除!
- 上一篇: C++——类和对象(上)
- 下一篇: 【易售小程序项目】后端部署、Uniapp项目Web部署